
If you are wondering how to adjust bike brakes properly, then keep reading further and ill tell you the very basics. There’s no need to have super technical knowledge or expensive instruments. All you need is a basic knowledge of how bike braking systems work and some common sense. Here we will cover the very basics.
First, the pad mechanism on your bicycle plays an important role in how you should be adjusting your brakes. Basically there are three types of pad you can use-pads that come with your rim, those that come with your wheels, and those that go on your frame. The type you get will depend on the kind of riding you do. If you are doing very high stress sports like mountain biking, your brakes pads will be stiffer. This is due to the high concentration of force necessary to stop.
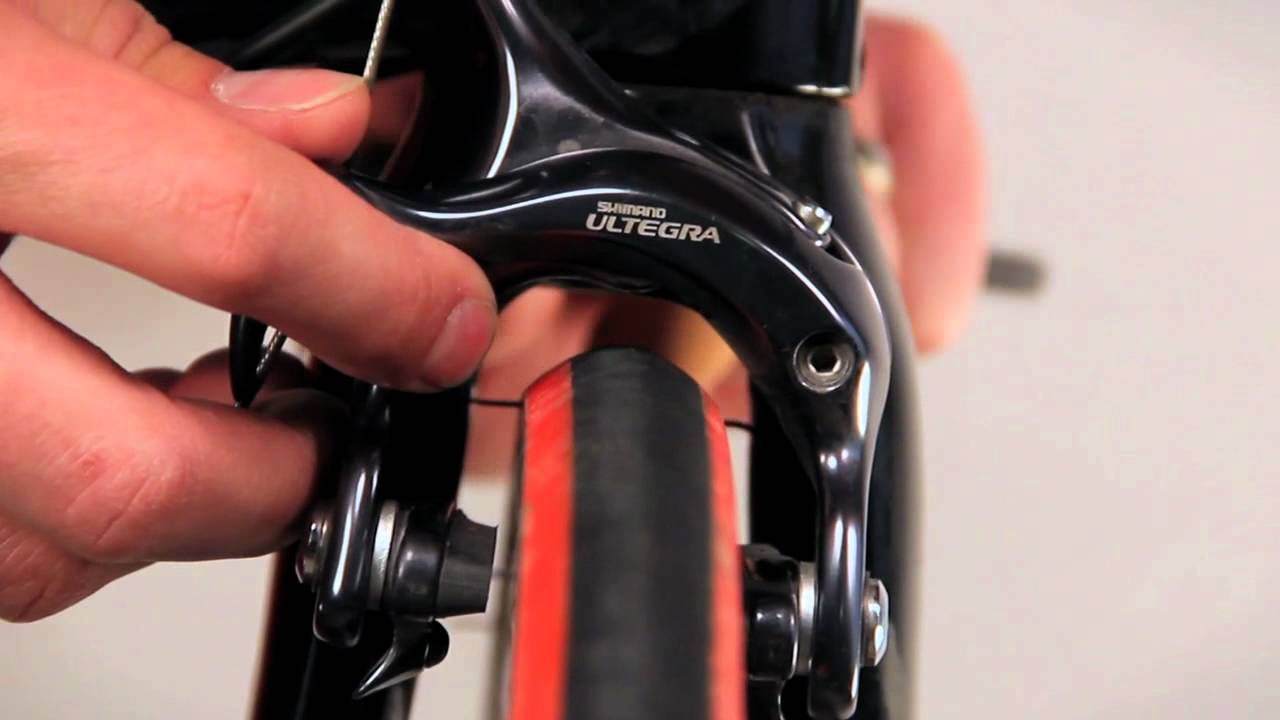
Now when tightening your bolts, it’s very important not to turn the screws too far in either direction-either clockwise or counterclockwise. This will cause undue stress on the bolt and it could break. If you have very tight bolts, you can always try using a socket wrench. Simply loosen the bolt a couple of turns and then tighten it. If you don’t feel comfortable doing it yourself, you can purchase a ratchet wrench for this purpose.
Next up, let’s talk about your front tire and the brake lever itself. To start, if you have a rear brake, simply loosen the bolt on the bottom of the front tire and pull the lever straight up. Then, loosen the bolt on the top of the back tire. Then, replace both the nuts and bolt. Do the same for your front tire.
You can do one of two things with regards to your front and back brake pads. The first thing is to increase brake strength by loosening all of the bolts in the same direction. To do this, you will need an Allen wrench. Once you have an Allen wrench, loosen all of the bolts on both sides of your frame. Then, put the Allen wrench under each of the front fender wells, on the seat stay, and behind the frame. Then, loosen the bolt on the tire as much as possible.
The next step is to remove the bolt and tighten the nut again. For this step, you will need an adjustable wrench. Make sure that the bolt is turned exactly one half-way through the socket. You can move forward on the lever until you hear a click. Then, reinstall the bolt and make sure that the nut is tightened enough that it doesn’t slip.
How to tighten bike disc brakes?

How to tighten bike disc brakes is a question that has plagued cyclists for as long as road bikes have been on the road. Tightening a bike’s disc can save you money in the long run, but only if you know how to do it. This article describes how to tighten bike disc brakes properly so that you can get the most stopping power for your money.
The most important feature of disc brakes is their ability to absorb a knock or two and still deliver a crisp stop after that. Unfortunately, the very nature of this characteristic means that disc brakes are very prone to getting kinks in them. Kinks in disc brakes are tiny cracks that form when the rim of the disc itself is pressed down on the rim of the inside of a bursa. The smaller the rim’s contact with the inner rim, the greater the pressure the rim can exert, and the larger the crack will be. When shopping for new disc brakes, you want to make sure that you purchase the models that have the least amount of internal rim damage and that have the smoothest surface.
To demonstrate how to tighten bike disc brakes, start by disengaging your hands from the handlebars so that you can lay the bike down flat. Position the bars perpendicular to the front wheel, with the saddle between the handles. Keep your arms and legs straight, without allowing them to curve inward or outward. Start by slowly pressing the right-hand side of the disc down into the seat. As you get used to the feel of the disc, you can increase the pressure, until you begin to feel a slight force working against the disc brakes. Increasing the pressure slightly should help the disc brake easier.
If you are learning how to tighten bike disc brakes, you might be tempted to skip the rim nut and go straight for the rim bolts. This can be a mistake, and can cause serious injury if you happen to come off the rim. When lowering your bike, do not remove the rim nuts all together. Always leave the rim nuts on, and keep the rim bolts locked into place. Make sure you have the lockable lug nut available, or you will need to use a screwdriver to force it in.
The final step to learning how to tighten bike disc brakes is to secure the front wheel and the rear wheel to the frame. To do this, attach a pair of quick lugs or ferrules to each wheel. The quick lugs are very easily removed by loosening the nut on the top of the tire. Then, twist the wheel in a clockwise direction to loosen the bolt that attaches the disc to the tire. Repeat the process for the other wheel.
Once you know how to tighten bike disc brakes, remember to always keep them locked. In order to prevent a problem with the discs, it is important to keep the rim and the disc firmly locked together. If you drop the bike, the rim and disc may crack or break. This could cause serious injury if it happened while you were riding! Tighten the brakes as soon as you learn how to tighten bike disc brakes. It is important to ride with safety and security in mind.


